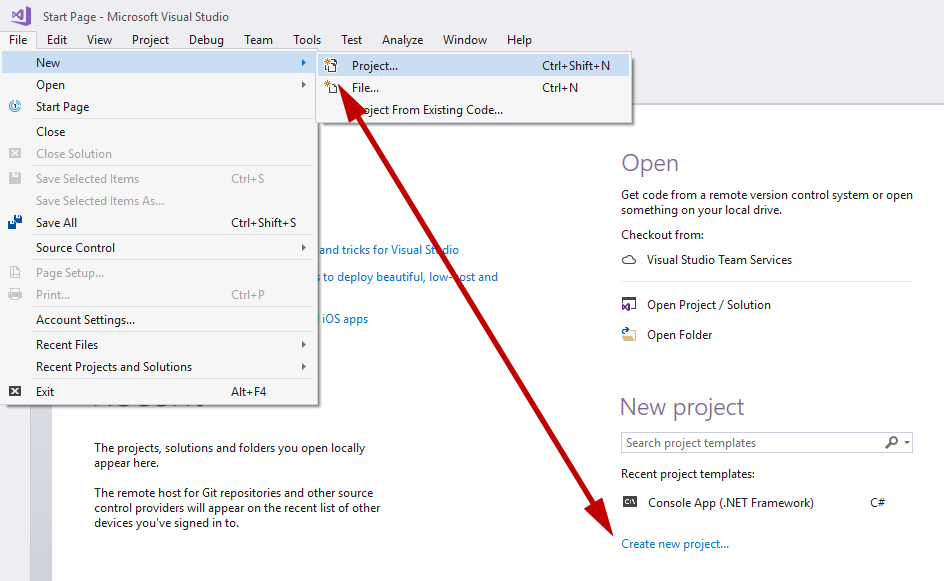
Open Visual Studio and Create a new Project
Select File -> New -> Project or Clicking ‘Create New Project’ link on Startup screen.
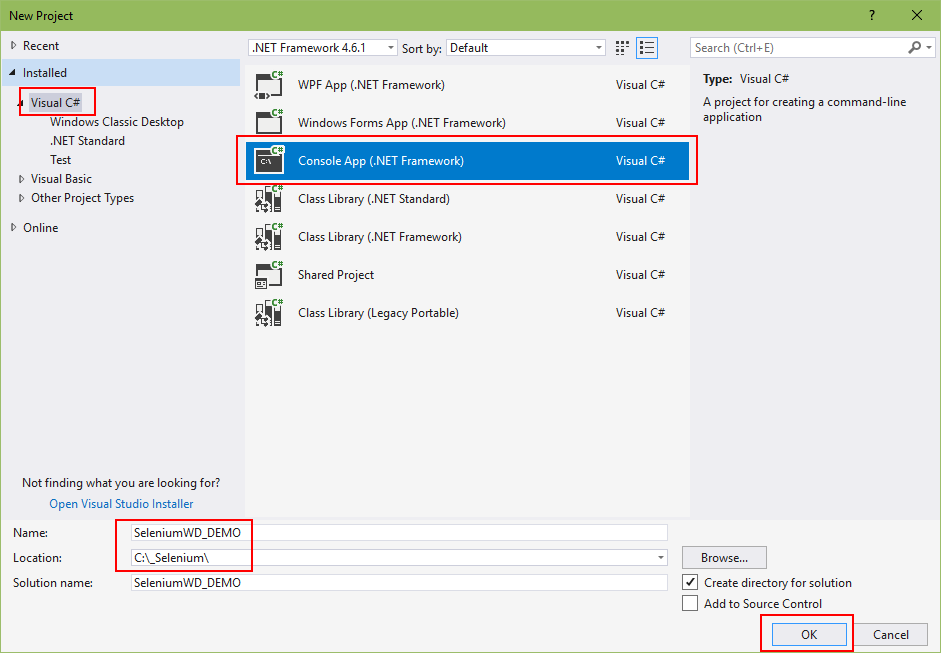
Select Visual C# -> Console Application, give your project a meaningful name, select the appropriate location and click OK.
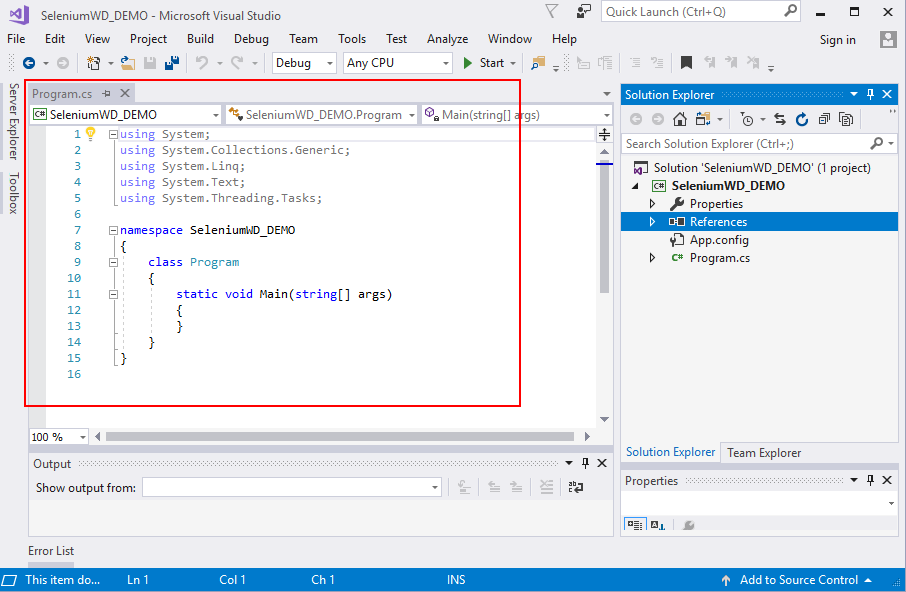
Add Selenium WebDriver references
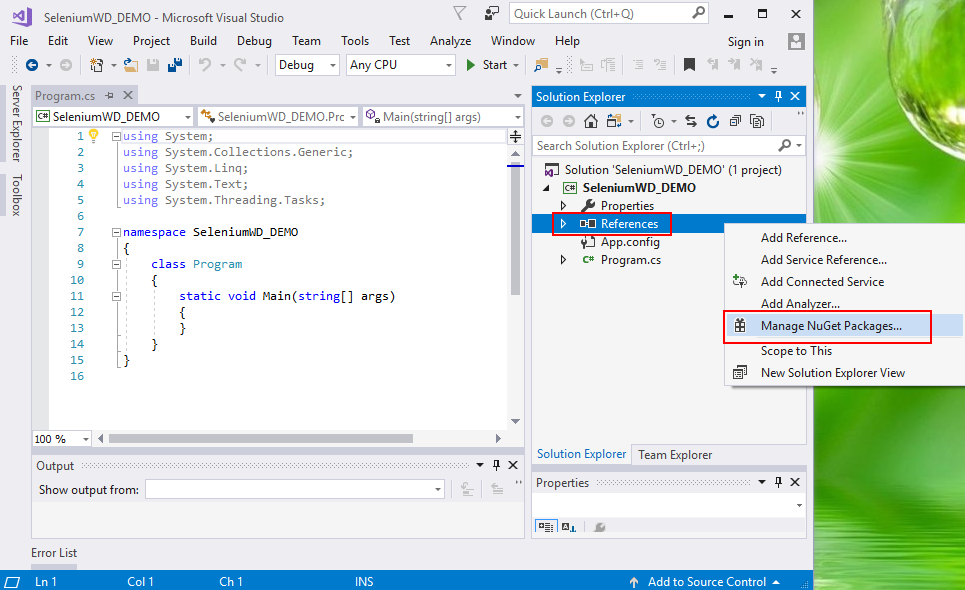
To use Selenium WebDriver in Visual Studio, add the references to WebDriver components (bindings). Visual Studio has a special tool for that called NuGet Package Manager. Right-click on the References in Solution Explorer and select ‘Manage NuGet Packages’ from the menu to open NuGet Package Manager.
In the NuGet Package Manager window switch to a ‘Browse’ tab and type Selenium in the search box. Available Selenium packages are displayed.
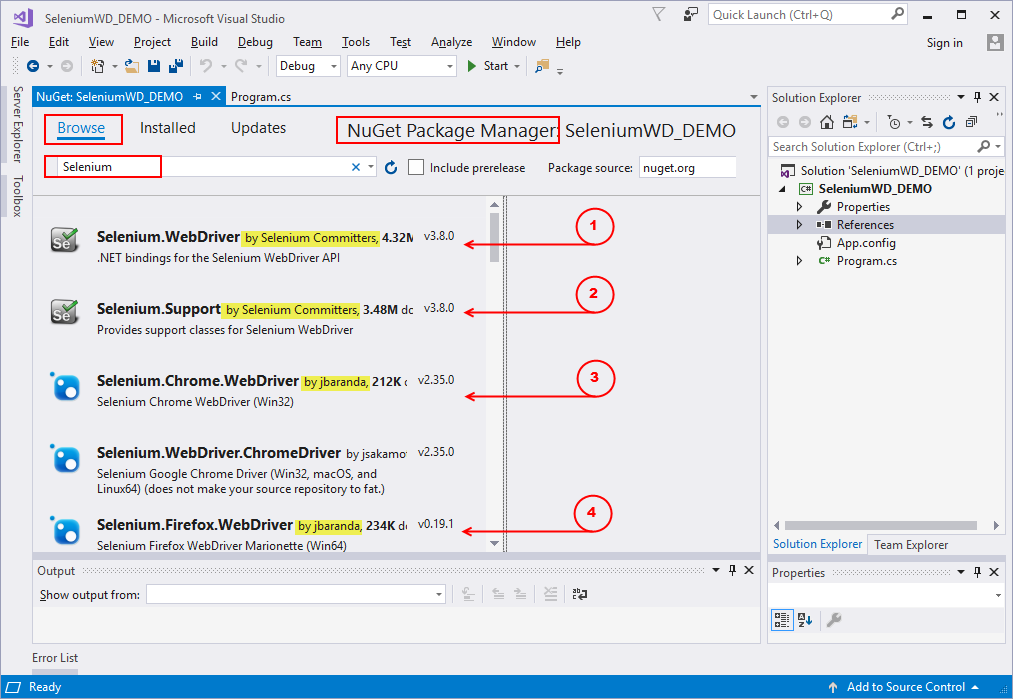
Select the following packages:
- Selenium.WebDriver by Selenium Committers
- Selenium.Support by Selenium Committers
- Selenium.Firefox.WebDriver by jbaranda
- Selenium.WebDriver.ChromeDriver by jbaranda
Confirm Selenium WebDriver packages installation
Selenium WebDriver with Firefox Browser
Add the following namespaces to use Selenium WebDriver Firefox classes.
using OpenQA.Selenium;
using OpenQA.Selenium.Firefox;
using System;
using System.Collections.Generic;
using System.Linq;
using System.Text;
using System.Threading.Tasks;

using OpenQA.Selenium;
using OpenQA.Selenium.Firefox;

namespace SeleniumWD_DEMO
{
    class Program
    {
        static void Main(string[] args)
        {
        }
    }
}
To confirm Selenium WebDriver Firefox components configuration add the following lines to your code:
IWebDriver driver = new FirefoxDriver();
driver.Url = "http://www.google.com";
using System;
using System.Collections.Generic;
using System.Linq;
using System.Text;
using System.Threading.Tasks;
using OpenQA.Selenium;
using OpenQA.Selenium.Firefox;
namespace SeleniumWD_DEMO
{
class Program
{
static void Main(string[] args)
{
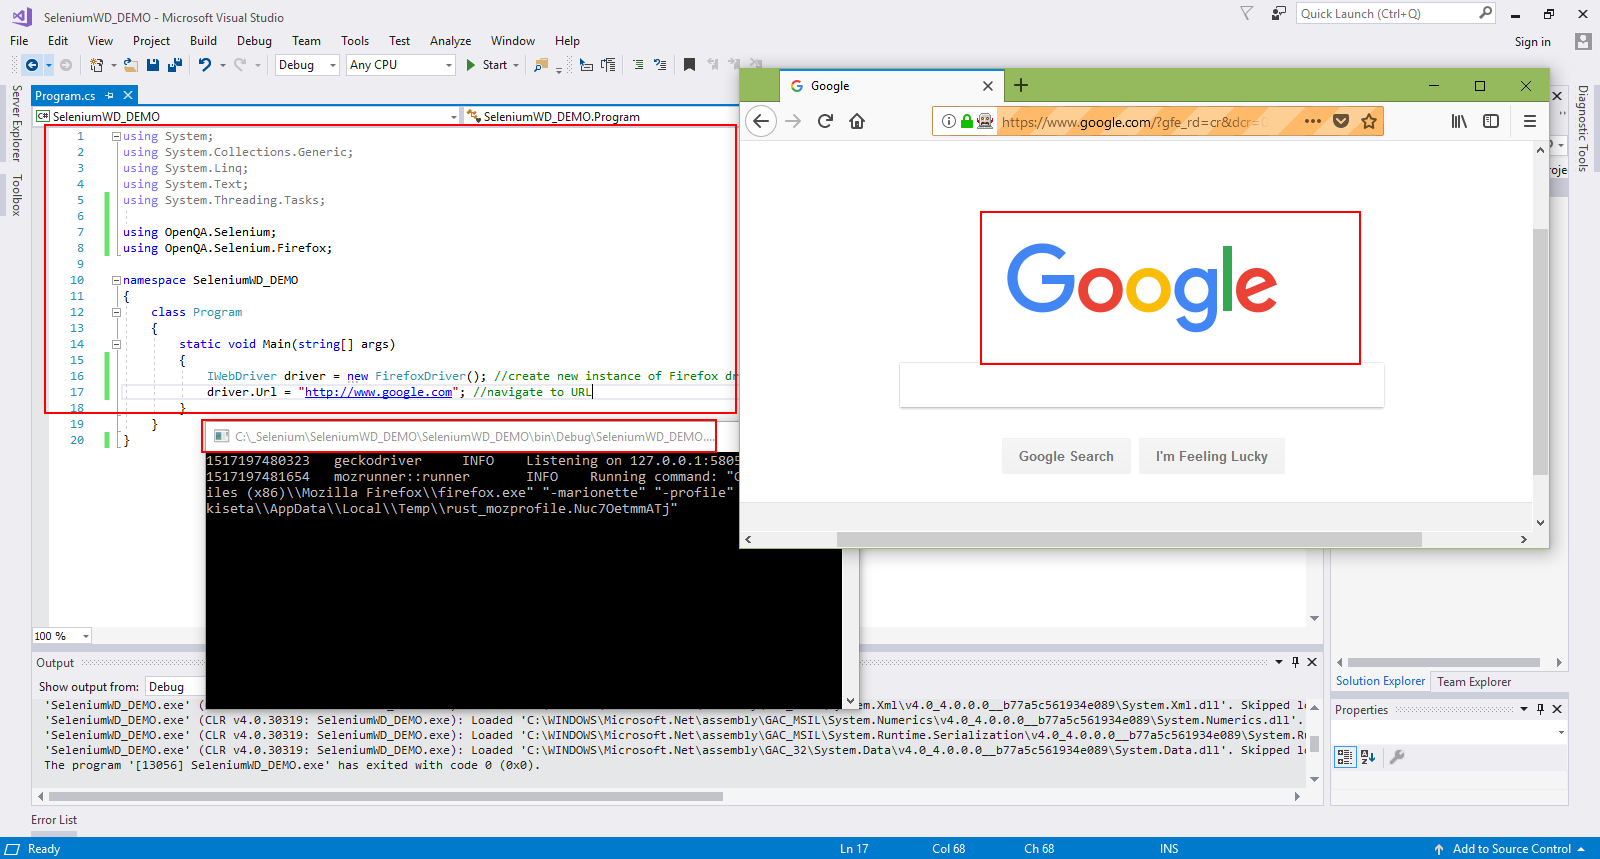
IWebDriver driver = new FirefoxDriver(); //create new instance of Firefox driver
driver.Url = "http://www.google.com"; //navigate to url
}
}
}Save the program and run it. You should see the program command prompt window open and then Firefox browser window open and navigate to the specified URL.
Selenium WebDriver with Chrome Browser
![]()
Add the following namespaces to use Selenium WebDriver Chrome classes and the following code to your program to confirm.
using OpenQA.Selenium.Chrome;
IWebDriver driver = new ChromeDriver();
driver.Url = "http://www.google.com";
using System;
using System.Collections.Generic;
using System.Linq;
using System.Text;
using System.Threading.Tasks;

using OpenQA.Selenium;
using OpenQA.Selenium.Firefox;
using OpenQA.Selenium.Chrome;

namespace SeleniumWD_DEMO
{
    class Program
    {
        static void Main(string[] args)
        {
            //IWebDriver driver = new FirefoxDriver(); //create new instance of Firefox driver
             IWebDriver driver = new ChromeDriver(); //create new instance of Chrome driver
             driver.Url = "http://www.google.com"; //navigate to url
        }
    }
}
To close the program after the test is finished.
Add this line of code to your program:
driver.Quit();
using System;
using System.Collections.Generic;
using System.Linq;
using System.Text;
using System.Threading.Tasks;

using OpenQA.Selenium;
using OpenQA.Selenium.Firefox;

namespace SeleniumWD_DEMO
{
    class Program
    {
        static void Main(string[] args)
        {
            //IWebDriver driver = new FirefoxDriver(); //create new instance of Firefox driver
             IWebDriver driver = new ChromeDriver(); //create new instance of Chrome driver
             driver.Url = "http://www.google.com"; //navigate to url
             driver.Quit();
        }
    }
}